How to Create A Screen Capture Video Using A MacBook Air and QuickTime
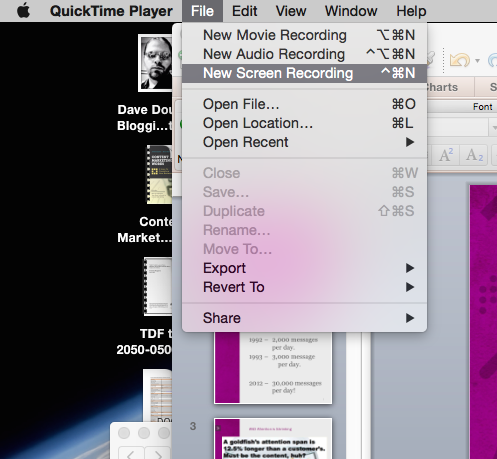
The first step is to open the QuickTime application along with which ever presentation platform—like PowerPoint for Prezi—you are using. When you have both of these applications open head over to the QuickTime Application, then up to the file tab in the menu bar and select new screen recording.
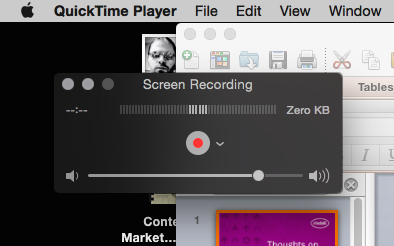
Once you select a new screen recording a mini menu box will appear. In the center of it is the recording button. Immediately to the right of the recording button is a carrot. This is for your audio options make whether or not you’re using a microphone. The volume bar underneath is for your audio monitor. This is whether or not you want to hear your voice playback to you as you’re recording what you’re speaking.
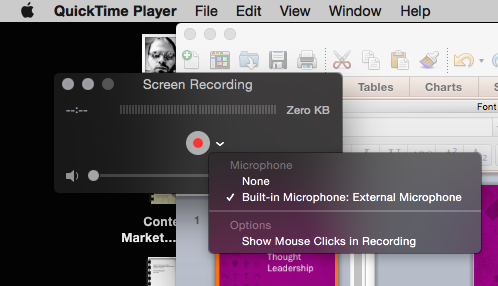
The top of this menu is your audio monitor and what it shows you how loud the input volume from the microphone is while you’re recording. Pay attention to this because this will reflect how loudly your voice will be on the actual recording once it’s done.
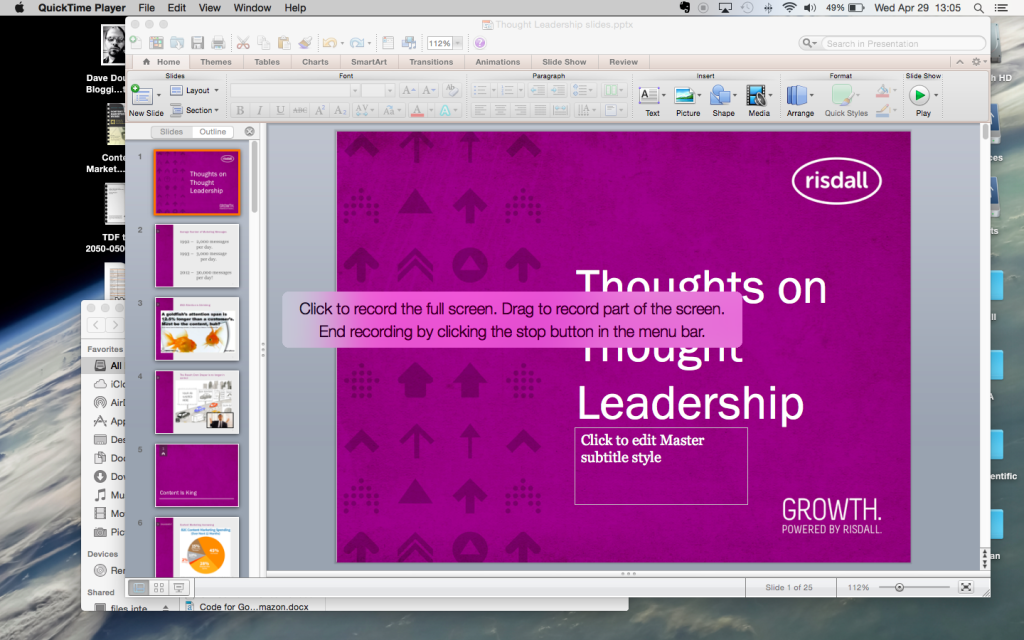
When you have all of the settings done the way you want hit record. This will change the screen you can either click on the rectangle in the middle of the screen for full screen recording or choose which part of the screen you wish to record. The other instruction in this rectangle tells you to end the recording by clicking the stop button in the menu bar. Once you start recording, in the top right corner of your screen, near of the volume, Bluetooth and Wi-Fi icons, there’ll be a stop button. This is what it is referring to.
If you have selected to only record a portion of your screen then the following picture Will be the next screen you’ll see. After you have the portion of the screen you wish to record hit me start recording button in the middle of the screen. This will return you to a normal looking screen even though now all of the audio and the actions taken on the screen are being recorded.
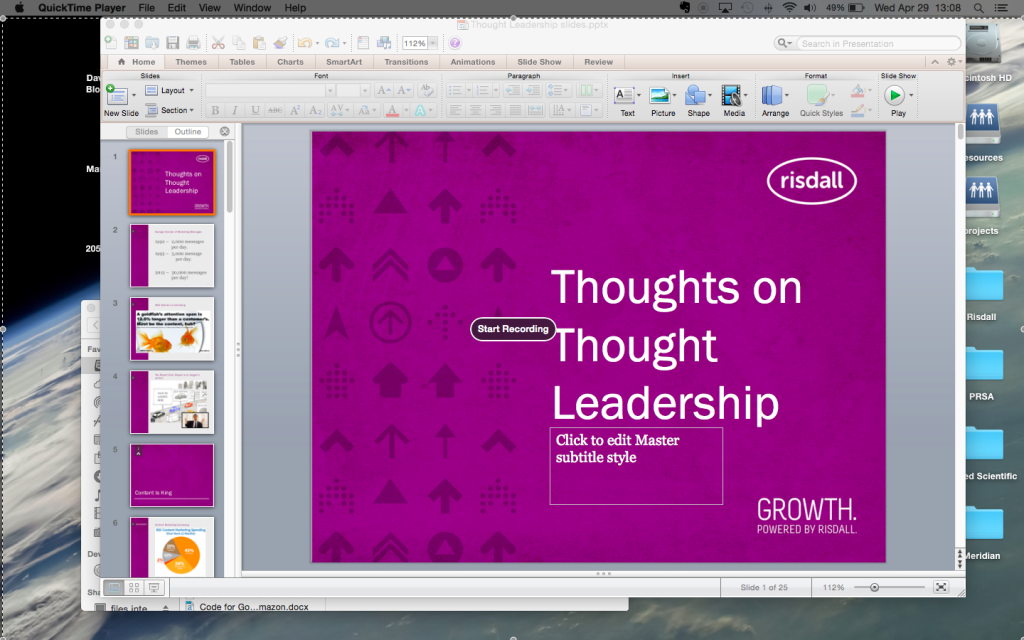
After you start recording click into your presentation platform enter full screen mode for your slide share or presentation mode, whichever one it is, and begin giving your presentation. When you’re done hit the stop stop by and at the top right corner and be sure to save video.
Recommendations for Producing Your Screen Capture Videos
I have had really good luck by using my iPhone headphones to have the little microphone in them while recording videos. The audio quality surprisingly exceptional for such basic and small equipment.
If you don’t have the iPhone headphones the built-in microphone in the Apple laptops are quite good as well. However you’re likely to pick up more background noise with whatever room you’re in or whatever meeting is going on in the room next to you.
Other than that here are some other recommendations to get the best screen capture video from your presentation:
- Have your presentation finalized before you start recording
- Have any notes next year so that you hit all of the important points as you talk
- Speak to the back of the room. Record your presentation as if you were giving it at the conference or seminar.
- Rehearse rehearse rehearse. You may have to do multiple takes of your video but that’s why we edit. However, we can reduce our editing time if you take the time to perfect your presentation before you record.
- Make sure that you are able to use all of the images in the presentation. If you have taken images from any source and not giving them a proper citation do not record until you have done so
- Make sure that you take all of the necessary steps to reduce the amount of noise that could potentially be picked up by The microphone. This includes your watch order jewelry on your hands and wrists, the cap on your bottled water, your soda can, buttons on your jacket hitting the table, coughing, sneezing, sighing, and the surprisingly loud paper turning.
- Be kind to the video editors and give a couple seconds of the dead noise around any screw ups so we know that there’s an editing point. This will make everything faster.